API testing is an essential part
of the development lifecycle.
Incorporating tests will allow us
to avoid regressions
and make sure our API performs
the way it's supposed to.
In other words,
the person using the API
expects consistent responses to their requests.
Integrating this into a CI pipeline automates this process and helps avoiding unintentional breaking changes.
We are going to be using
Hoppscotch.
This is an open source tool
similar to Postman
that allow us to make requests,
organize them and create test suites.
Read more about Hoppscotch:
hoppscotch.io
There is no App to download,
but you can run Hoppscotch as
an "installable" PWA:

In Google Chrome and Microsoft Edge
you will see an icon
in the Address bar to
"Install Hoppscotch app":

That will create what looks like a "Native" App on your Mac:

Which then opens full-screen an feels Native:

And you're all set to start testing the API.
Installing the
PWAwill significantly increase your dev speed because you can easily+Tabbetween your IDE andHoppscotchand not have to hunt for a Tab in your Web Browser.
You can use Hoppscotch anonymously
(without logging in),
without any loss of functionality.
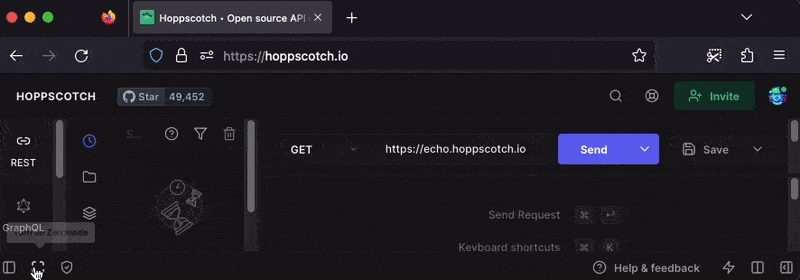
If you decide to Authenticate and you don't want to see the noise in the Top Nav, simply enable "Zen Mode":
With that out of the way, let's get started using Hoppscotch!
When you first open Hoppscotch,
either in the browser or as a PWA,
you will not have anything defined:

The first thing to do is open an existing collection:

Import from hoppscotch: /lib/api/MVP.json

Collection imported:

Next you'll need to open environment configuration / variables:


When you click on Localhost, you will see an Edit Environment Modal:

environment variables let us switch between development or production environments seamlessly.
Even after you have imported the environment configuration file, it's not automatically selected:

You need to manually select Localhost.
With the "Environments" tab selected, click the "Select environment" selector and chose "Localhost":

Once you've selected the Localhost environment, the <<host>> placeholder will turn from red to blue:

After importing the collection,
open the MVP and Items folder,
you will see a list of possible requests.
After importing the collection and environment, it still won't work ...

You will see the message:
Could not send request.
Unable to reach the API endpoint. Check your network
connection or select a different interceptor and try again.
These are the available options:

If you select "Browser extension" it will open the Chrome web store where you can install the extension.
Install the extension.
Once installed,
add the the http://localhost:4000 origin:

Then the presence of the extension will be visible in the Hoppscotch window/UI:


Now you can start testing the requests!
Start the Phoenix server locally
by running mix s
The requests in the collection will finally work:

If you open MVP, Items
and try to Get Item (by clicking Send),
you will receive a response from the localhost server.


Depending if the item with id=1
(which is defined in the env variable item_id
in the localhost environment),
you will receive a successful response
or an error, detailing the error
that the item was not found with the given id.
You can create tests for each request,
asserting the response object and HTTP code.
You can do so by clicking the Tests tab.

These tests are important to validate the expected response of the API. For further information on how you can test the response in each request, please visit their documentation at https://docsapi.io/features/tests.
These tests can (and should!)
be used in CI pipelines.
To integrate this in our Github Action,
we will need to make some changes to our
workflow file
in .github/worflows/ci.yml.
We want the runner to be able to execute these tests.
For this, we are going to be using
Hoppscotch CLI.
With hopp (Hoppscotch CLI),
we will be able to run the collection of requests
and its tests in a command-line environment.
To run the tests inside a command-line interface, we are going to need two files:
- environment file,
a
jsonfile with each env variable as key and its referring value. For an example, check thelib/api/localhost.jsonfile. - collection file,
the
jsonfile with all the requests. It is the one you imported earlier. You can export it the same way you imported it. For an example, check the/lib/api/MVP.jsonfile.
These files
will need to be pushed into the git repo.
The CI will need access to these files
to run hopp commands.
In the case of our application,
for the tests to run properly,
we need some bootstrap data
so each request runs successfully.
For this,
we also added a
api_test_mock_data.sql
SQL script file that will insert some mock data.
It's time to add this API testing step
into our CI workflow!
For this, open .github/workflows/ci.yml
and add the following snippet of code
between the build and deploy jobs.
  # API Definition testing
  # https://docs.hoppscotch.io/cli
  api_definition:
    name: API Definition Tests
    runs-on: ubuntu-latest
    services:
      postgres:
        image: postgres:12
        ports: ['5432:5432']
        env:
          POSTGRES_PASSWORD: postgres
        options: >-
          --health-cmd pg_isready
          --health-interval 10s
          --health-timeout 5s
          --health-retries 5
    strategy:
      matrix:
        otp: ['25.1.2']
        elixir: ['1.14.2']
    steps:
    - uses: actions/checkout@v3
    - name: Set up Elixir
      uses: erlef/setup-beam@v1
      with:
        otp-version: ${{ matrix.otp }}
        elixir-version: ${{ matrix.elixir }}
    - name: Restore deps and _build cache
      uses: actions/cache@v3
      with:
        path: |
          deps
          _build
        key: deps-${{ runner.os }}-${{ matrix.otp }}-${{ matrix.elixir }}-${{ hashFiles('**/mix.lock') }}
        restore-keys: |
          deps-${{ runner.os }}-${{ matrix.otp }}-${{ matrix.elixir }}
    - name: Install dependencies
      run: mix deps.get

    - name: Install Hoppscotch CLI
      run: npm i -g @hoppscotch/cli

    # Setups database and adds seed data for API definition tests
    - name: Run mix setup
      run: mix ecto.setup
      env:
        MIX_ENV: dev
        AUTH_API_KEY: ${{ secrets.AUTH_API_KEY }}

    - name: Running server and Hoppscotch Tests
      run: mix phx.server & sleep 5 && hopp test -e ./lib/api/localhost.json ./lib/api/MVP.json
Let's breakdown what we just added.
We are running this job in a
service container
that includes a PostgreSQL database -
similarly to the existent build job.
We then install the Hoppscotch CLI
by running npm i -g @hoppscotch/cli.
We then run mix ecto.setup.
This command creates the database,
runs the migrations
and executes run priv/repo/seeds.exs.
The list of commands is present
in the mix.exs file.
We are going to change the seeds.exs
file to bootstrap the database
with sample data for the API tests to run.
At last,
we run the API by running mix phx.server
and execute hopp test -e ./lib/api/localhost.json ./lib/api/MVP.json.
This hopp command takes the environment file
and the collections file
and executes its tests.
You might notice we are using sleep 5.
This is because we want the hopp
command to be executed
after mix phx.server finishes initializing.
And you should be done!
When running hopp test,
you will see the result of each request test.
↳ API.Item.update/2, at: lib/api/item.ex:65
 400 : Bad Request (0.049 s)
[info] Sent 400 in 4ms
  ✔ Status code is 400
  Ran tests in 0.001 s

Test Cases: 0 failed 31 passed
Test Suites: 0 failed 28 passed
Test Scripts: 0 failed 22 passed
Tests Duration: 0.041 s
If one test fails, the whole build fails, as well!
As we mentioned prior,
the last thing we need to do is
to change our priv/repo/seeds.exs file
so it adds sample data for the tests to run
when calling mix ecto.setup.
Use the following piece of code
and change seeds.exs to look as such.
if not Envar.is_set?("AUTH_API_KEY") do
  Envar.load(".env")
end

if Mix.env() == :dev do
  App.Item.create_item(%{text: "random text", person_id: 0, status: 2})

  {:ok, _timer} =
    App.Timer.start(%{
      item_id: 1,
      start: "2023-01-19 15:52:00",
      stop: "2023-01-19 15:52:03"
    })

  {:ok, _timer2} =
    App.Timer.start(%{item_id: 1, start: "2023-01-19 15:55:00", stop: nil})
end
We are only adding sample data
when the server is being run in dev mode.
If you get stuck while getting this setup, please read through: dwyl/mvp/issues/268 and leave a comment.